French Silk Pie

Recently, amidst my frustrations from job searching and onset existential crisis, I received an email that threw out all my anxiety in seconds and made me feel like a million bucks. It was someone at the library who had tasted my salted caramel cupcakes (remember the ones I almost didn’t give to my boss because I wanted to eat them myself) and wanted to place an order for Thanksgiving. She sounded so excited that it was impossible for me to not get excited with her. Plus the fact that she was placing a huge order. To be quite honest, I don’t know what got me more- the fact that I’d be earning or that I’d have to bake everything. My money is on the latter.

She asked for three different flavours of cupcakes and a French silk pie. I’ve never tasted one, let alone make one. This was going to be fun! For the cupcakes, we decided on almond & salted caramel, strawberries, and lemon honey. Last year, I participated in the Graduate Cupcake Wars here in Dartmouth, and made lemon honey cupcakes with fondant bees and honeycombs. Oh, that was so much fun. I sat up all night making those bees and it took more that four tries for me to get those honeycombs right.

The weekend before Thanksgiving, I sat down to do my research about French silk pie. If you are like me and have no idea what it is, this is what you have to know. It has a pie crust that is blind baked, a light, airy chocolate mousse filling garnished with whipped cream and chocolate shards. Just the description got me drooling and then I distracted myself for an hour just looking at photos of different French silk pies that people around the world made. But getting back to business, I learnt that as this is not a baked pie, the eggs in the mousse has to be pasteurized. Did you know that you don’t get pasteurised eggs that easily? I was suggested to place an order with the local co-op or at Hannafords. That seemed like too much trouble, so I started looking at DIY options.

Pasteurized eggs are basically eggs which sit in hot water just enough to kill the bacteria, but not cook it. Ideally if you want to do it at home, it is advised to use a thermometer, but if you don’t have one, fret not. Place the eggs in cold water. Make sure there is about an inch of water above the eggs and watch them like a hawk. When you see bubbles forming and I’m talking about the tiny ones that start creeping up on the base of your saucepan, take it off heat and set it aside for three minutes. Run them under cold water and you got yourself some pasteurized eggs. The first time I tried, I left them for a touch longer on the stove and the egg whites coagulated, but the second time came out perfectly.

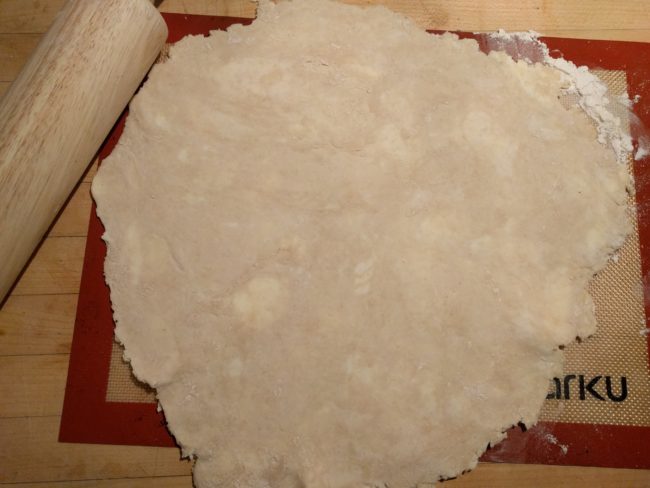
Now, let’s talk crust. I like making my own pie crust and follow a 3-2-1 recipe. 3 parts flour – 2 parts butter – 1 part ice water. And a dash of salt. Leave working the dough to a minimum. More gluten means less flakiness. I just use my fingers to crumble the butter and knead just until it comes together. Wrap it up and put it in the fridge for at least an hour. Never skip this step. You’ll be left with a greasy, unappealing pie crust. After an hour, roll out the dough and blind bake the crust at 350 F. To blind bake, gently poke the bottom of your crust with a fork after you’ve laid it out in the pan. Use a piece of foil to line the pie crust and fill it with oven weights or uncooked beans. I also use old pennies. This keeps the pie from raising up and robbing you of filling space.
For the filling, it’s all about being patient. Whipping the mousse takes a while as you have to make sure that it is light and fluffy. The first step starts with melting the chocolate as this needs to cool down. You can use a double broiler to melt your chocolate or melt it in the microwave in 15 second bursts. Allow it to cool while you start on creaming the butter and sugar together. Traditionally, the recipe calls for granulated sugar. You’ll have to cream this until you can’t almost feel the granules and this is supposed to disappear after you set it for a night. I read many people complaining that they could still feel the granules in the pies that they made, and I felt it in my test pie too for two days. The second time I made this pie, I experimented with confectioner’s sugar instead and found it to be much better. Confectioner’s sugar contains cornstarch and this helps the mousse set better. The choice is yours.
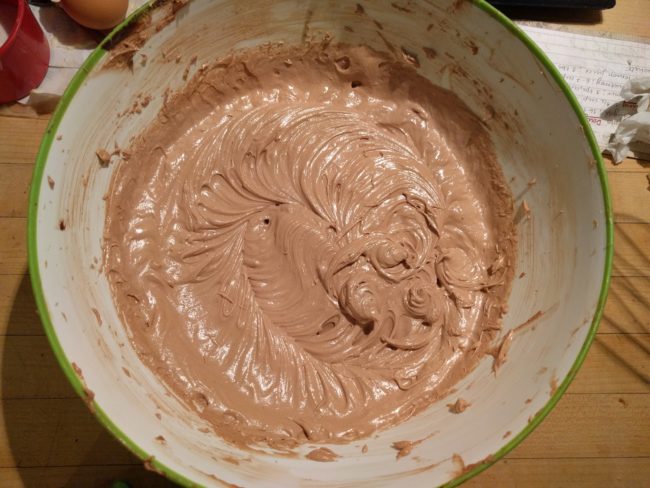
Creaming butter and sugar takes about three minutes on medium speed. Remember, always start with butter in room temperature. You shouldn’t be able to pick it up with your hands, but it should hold it’s shape. Whip them up until it becomes light and fluffy. Once you are satisfied, add the cooled chocolate, salt, and vanilla essence. Mix well. Next comes the eggs. Crack one in and whip for about five minutes. The egg should be well incorporated. You’ll start seeing a glossy sheen. Repeat this process for all the eggs. I had totally underestimated how long five minutes is. Every time I would whip for what seemed like a long time and turn to see the oven clock and notice that only a minute would have passed. By the 2nd egg, I gave up, pulled a bar stool and just sat holding the mixer. After all the eggs, your mousse would become light (both colour and density) and will look silky and glistening.
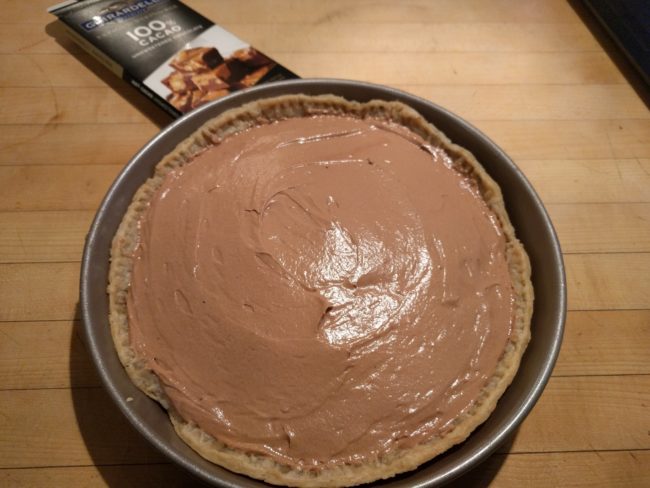
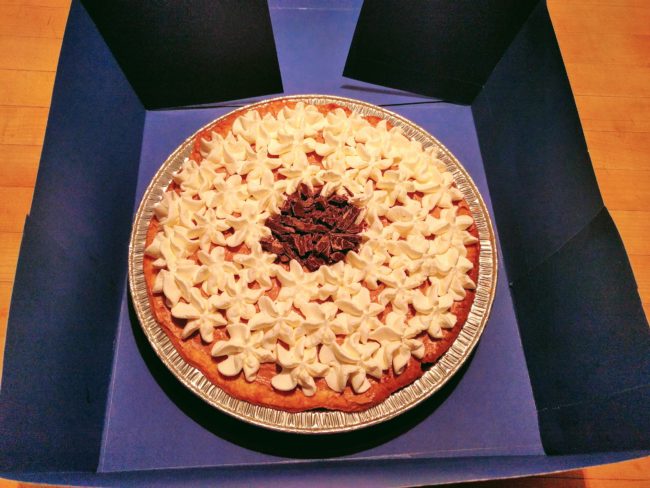
Fill the cooled pie crust with the chocolate mousse and allow it to set in the fridge while you work on the whipped cream. You could, of course, use canned whipped cream as well. If you are making it from scratch, use cold, cold heavy cream. In fact, stick our bowl in the freezer for a few minutes before starting. Whip the cream at high speed until it starts to thicken a bit. Add two-three tablespoons of confectioner’s sugar, depending on how sweet you want it to be, and a few drops of the vanilla extract. Whip again until it forms stiff peaks. Fill this in a piping bag. I used a closed star tip for the design, you could go wild with your imagination as to how you want to decorate the pie. Same with the chocolate garnish. I chopped up a Ghiradelli semi-sweet chocolate bar into thin shards, but you could make shavings, curls, powder, anything. Decorate the pie and allow it to set overnight.
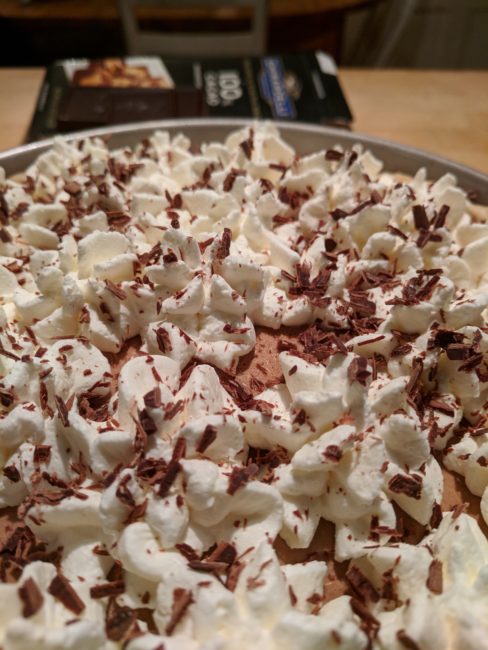
The pie was a hit both at home and with the client. The best part of this mousse is like sugar, the salt also sets overnight and the taste it brings out is absolutely brilliant. It also prevents the mousse from being too sweet. To pack the pie, I made a box out of a dark blue card stock, one that would best showcase the French silk pie. What do you think?
Light, airy, melt-in-your-mouth chocolate mousse with a crisp, flaky pie crust. Bring together all the ingredients for a pie crust. Use a pastry cutter, a fork, or your hands to better blend the flour and butter. Don't over knead. Once it comes together, wrap it up in Saran wrap and chill it for 30 minutes. After 30 minutes, roll out the dough and place in on your pan. Crimp the edges and poke holes in the bottom with a fork before lining the dough with aluminium foil and place weights on top. You can use dry rice or dry beans. I used about a cup of old pennies. Bake it at 375 F for about 20 minutes or till you the edges start becoming a bit golden. Remove the foil and bake it for another 15-20 minutes or until the crust becomes golden all over. Melt the chocolate over a double-broiler or in a microwave over 15 second bursts. Set it aside and let it cool. In the meantime, cream the butter and sugar together until it becomes light and fluffy. Add the salt, vanilla extract, and melted chocolate. Once it we well mixed, add one egg and mix on medium speed for 5 minutes. Repeat this process with the rest of the eggs. Fill the cooled pie with the chocolate mousse and allow it in the set in the fridge. Place your whipping bowl in the freezer for 5 minutes before starting. Whip the cold heavy cream at high speed until it thickens a bit. Add the confectioner's sugar and vanilla extract. Continue whipping until it forms stiff peaks. Pipe the whipped cream and garnish with some chocolate shards or curls. AuthorPriyanka SivaramakrishnanDifficultyBeginner
Ingredients
Your culinary “creations” are FANTASTIC! Now, I have to sample them!
May I come visit sometime? Seriously! I live in another state but would be happy
to travel there to sample your chocolate cake, French Silk Pie, Caramel Cupcakes,
and more! Please let me know. I am your loyal fan and friend for life!